
 View Cart
 sales@dataq.com
 330-668-1444
How to add timestamps for WinDaq ExcelLink automatically
To maximize the performance, WinDaq ExcelLink sends data to Excel without time stamping for each row of data except in Event Trigger mode. Here are the steps to add time stamps automatically in Excel. Sample Excel book can be found here
1. For demo purpose, we use ExcelLink to collect a block of data manually, please take note of the starting location of Excel Link, C2
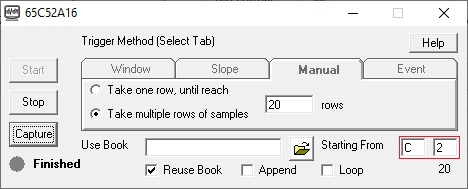
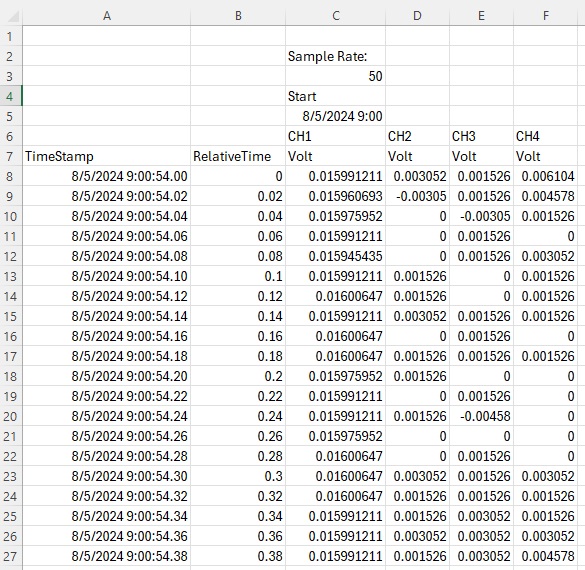
2.Here is a sample block captured with above ExcelLink configuration. Please note, since the starting location is C2, the actual sample is placed in cell C3, and it will be referenced as $C$3 in the following equations. The first row of data starts at row 8. Finally, the start time is in cell C5, and it will be referenced as $C$5 in the following equations
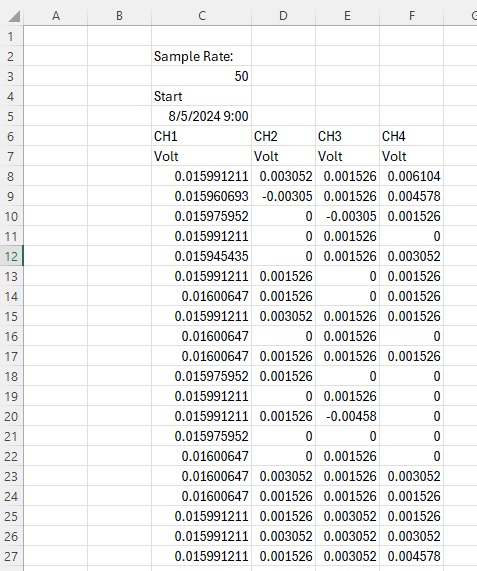
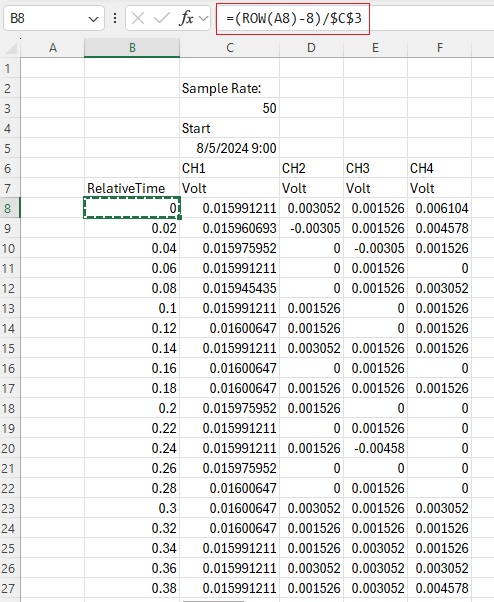
3. First we construct a column to display relative time, since the first row of data starts at 8, ROW( )-8 returns the row offset between a select row and row 8, since C3 stores the actual sample rate, the equation (ROW( )-8)/$C$3 returns the relative time in seconds
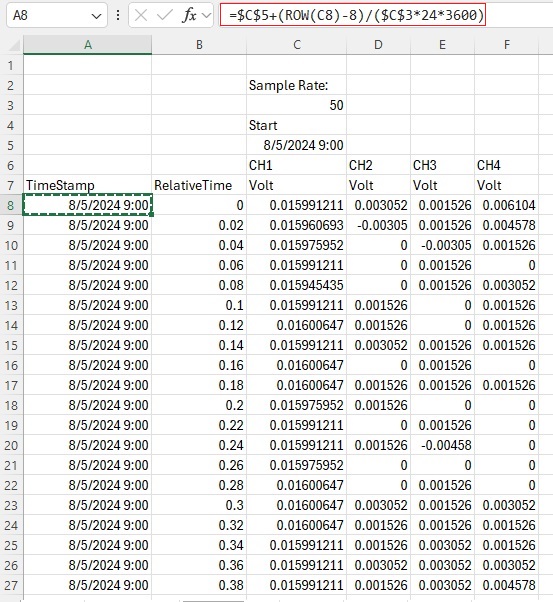
4. Then a column for time stamps is constructed. TimeStamp=StartTime+TimeOffsetInExcelFormat, where TimeOffsetInExcelFormat=LineDifference/(SampleRate*SecondsInADay). Please note LineDifference=ROW( )-8, and SampleRate=$C$3
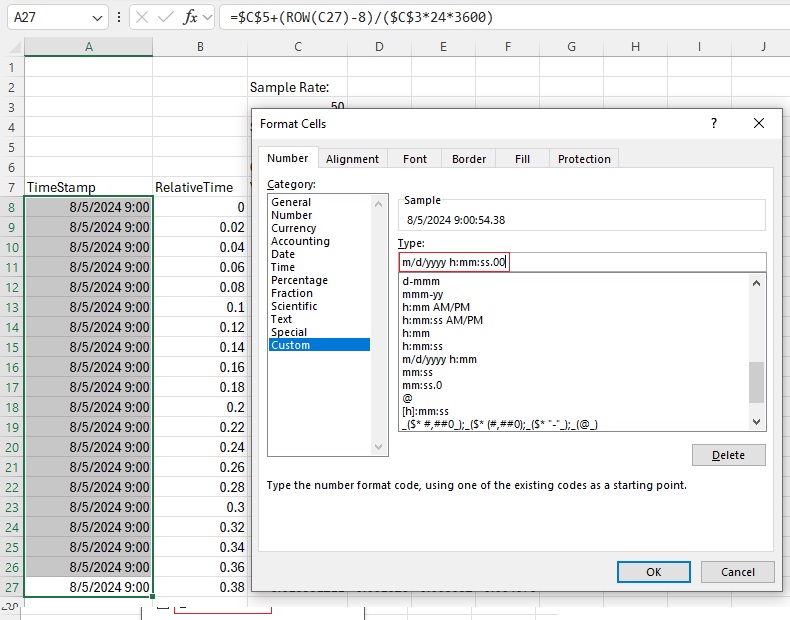
5. To display timestamp with higher resolution, select the timestamps and right click and select Format Cells...
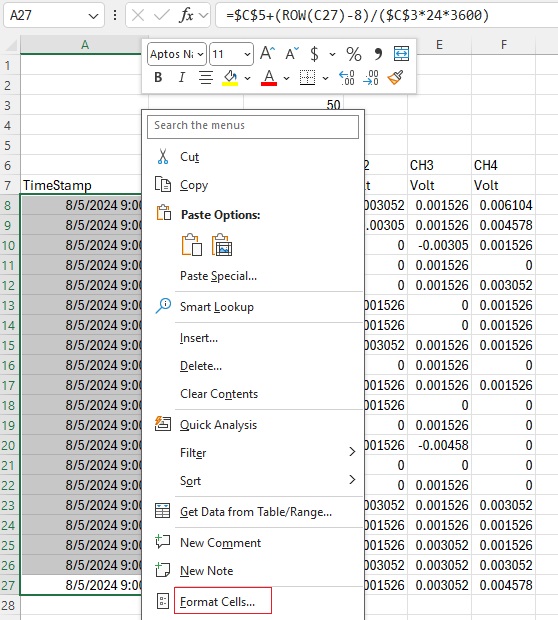
6. Use customization to show fraction of seconds
7. Here is the final result
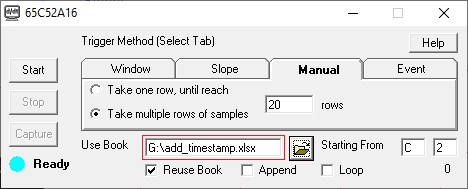
8. To reuse the template, we save the above Excel book as add_timestamp.xls. In ExcelLink, we specify the book
9. With the above configuration, and Excel workbook, the time stamps will be addedd automatically
